1 什么是 PEP8
PEP8 是Python编程语言的一份官方编码风格指南,旨在提高代码的可读性和可维护性。它定义了代码布局、命名约定、注释风格等方面的规范,以确保Python代码的一致性和清晰性。
https://www.python.org/dev/peps/pep-0008/
2 了解 Python 之禅吗?
import this
The Zen of Python, by Tim Peters
《Python禅》,蒂姆·彼得
Beautiful is better than ugly.
美总比丑好。
Explicit is better than implicit.
隐式比显性好。
Simple is better than complex.
简单总比复杂好。
Complex is better than complicated.
复杂总比复杂好。
Flat is better than nested.
平的比嵌套的好。
Sparse is better than dense
疏胜于密。
Readability counts.
可读性很重要。
Special cases aren’t special enough to break the rules.
特殊情况不足以打破规则。
Although practicality beats purity.
尽管实用性胜过纯洁性。
Errors should never pass silently.
错误不应该悄悄地过去。
Unless explicitly silenced.
除非明确沉默。
In the face of ambiguity, refuse the temptation to guess.
面对模棱两可,拒绝猜测的诱惑。
There should be one-- and preferably only one --obvious way to do it.
应该有一种——最好只有一种——显而易见的方法。
Although that way may not be obvious at first unless you’re Dutch.
虽然这种方式起初并不明显,除非你是荷兰人。
Now is better than never.
现在总比没有好。
Although never is often better than right now.
虽然从来没有比现在更好。
If the implementation is hard to explain, it’s a bad idea.
如果实现很难解释,这是个坏主意。
If the implementation is easy to explain, it may be a good idea.
如果实现很容易解释,那可能是个好主意。
Namespaces are one honking great idea – let’s do more of those!
让我们再来一个名字空间吧!
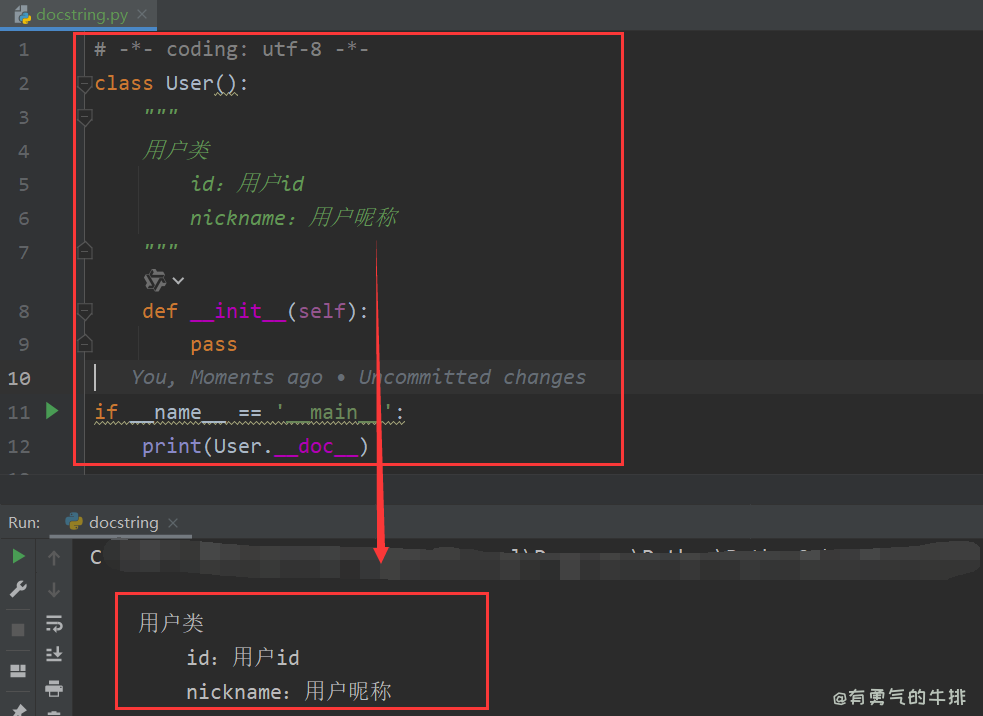
3 什么是 docstring?
Docstring是指在Python中用于文档化代码的字符串。它通常是函数、类、模块或方法的定义中的第一行,用于解释其功能、参数、返回值等信息。Docstring存储在对象__doc__属性中,可以通过访问该属性来获取docstring。
定义方式:
通常使用三引号(’’'或""")括起来的字符串来定义,并放在
案例
class User():
"""
用户类
id:用户id
nickname:用户昵称
"""
def __init__(self):
pass
if __name__ == '__main__':
print(User.__doc__)
4 Python 类型注解
类型注解是 Python 3.5 引入的一个新特性,它允许开发者为变量、函数参数和返回值提那家类型提示,以提高代码的可读性和可维护性,并支持静态类型检查。
def add(x: int, y: int) -> int:
    return x + y
5 例举你知道 Python 对象的命名规范,例如方法或者类等
模块名和包名:全部小写,单词间用下划线分割。
my_module、my_package
**类名:**使用驼峰式(首字母大写)。
MyClasee、UserService
**全局变量和常量:**大写字母和下划线.。
MAX_COUNT、PI
普通变量和函数名:使用小写字母和下划线。
my_var、calculate_sum
私有变量和方法:以下划线开头。
_private_var、_private_method
**特殊方法(魔术方法):**使用双下划线开头和结尾。
__init__、__str__
类内部的私有变量:可以使用双下划线开头,但这种方式通常用于避免子类中同名变量冲突,而不是真正的私有化。
__private_var
6 Python 中的注释有几种?
"""
多行、docstring
"""
7 如何优雅的给一个函数加注释?
使用docstring,在函数开始第一行使用三引号。
def add(x, y):
    """
    加法函数
    	x: 参数一
    	y: 参数二
    """
    return x + y
8 Python 代码缩进中是否支持 Tab 键和 空格键混用?
理论上支持,但不推荐。
建议统一使用空格(通常是4个空格为一个缩进层级)来保持代码的可读性和一致性。
在PEP8规范中建议使用4个空格。
9 是否可以在一句import中导入多个库?
可以,
在python中,可以使用 , 将多个模块在一条语句中导入。
虽然python支持一行导入多个,但是在PEP8(官方编码规范)建议每个模块独占一行,以提高代码的可读性。(在java中也是相同规范)。
例如:
import os, sys, time
等同于
import os
import sys
import time
也可以使用 from...import... 一次导入多个对象(不是多个模块)
from math import sin, cos, pi
10 在 Python 中文件命名的时候需要注意什么?
全小写,单次之间使用下划线分隔。
11 例举几个 Python 代码风格的工具。
| 工具名 |
主要功能 |
特点/说明 |
| PEP8 / pycodestyle |
检查是否符合 PEP8 编码规范 |
最基础的风格检查工具,原名 pep8 |
| flake8 |
综合检查:PEP8 + 语法 + 命名等 |
可以集成 pycodestyle、mccabe、pyflakes |
| pylint |
强大的静态代码分析工具 |
可配置性强,评分制(0~10 分) |
| black |
自动格式化代码(“黑盒式”) |
快速统一风格,“不要争论格式”,可直接重写代码 |
| isort |
自动整理 import 顺序 |
和 black 常配合使用 |
| autopep8 |
自动修复不符合 PEP8 的代码格式问题 |
相比 black 更保守,更贴近原始代码风格 |
<h2><a id="1__PEP8_0"></a>1 什么是 PEP8</h2>
<p>PEP8 是Python编程语言的一份官方编码风格指南,旨在提高代码的可读性和可维护性。它定义了代码布局、命名约定、注释风格等方面的规范,以确保Python代码的一致性和清晰性。</p>
<p><a href="https://www.python.org/dev/peps/pep-0008/" target="_blank">https://www.python.org/dev/peps/pep-0008/</a></p>
<h2><a id="2__Python__6"></a>2 了解 Python 之禅吗?</h2>
<pre><div class="hljs"><code class="lang-python"><span class="hljs-keyword">import</span> this
</code></div></pre>
<pre><div class="hljs"><code class="lang-shell">The Zen of Python, by Tim Peters
《Python禅》,蒂姆·彼得
Beautiful is better than ugly.
美总比丑好。
Explicit is better than implicit.
隐式比显性好。
Simple is better than complex.
简单总比复杂好。
Complex is better than complicated.
复杂总比复杂好。
Flat is better than nested.
平的比嵌套的好。
Sparse is better than dense
疏胜于密。
Readability counts.
可读性很重要。
Special cases aren’t special enough to break the rules.
特殊情况不足以打破规则。
Although practicality beats purity.
尽管实用性胜过纯洁性。
Errors should never pass silently.
错误不应该悄悄地过去。
Unless explicitly silenced.
除非明确沉默。
In the face of ambiguity, refuse the temptation to guess.
面对模棱两可,拒绝猜测的诱惑。
There should be one-- and preferably only one --obvious way to do it.
应该有一种——最好只有一种——显而易见的方法。
Although that way may not be obvious at first unless you’re Dutch.
虽然这种方式起初并不明显,除非你是荷兰人。
Now is better than never.
现在总比没有好。
Although never is often better than right now.
虽然从来没有比现在更好。
If the implementation is hard to explain, it’s a bad idea.
如果实现很难解释,这是个坏主意。
If the implementation is easy to explain, it may be a good idea.
如果实现很容易解释,那可能是个好主意。
Namespaces are one honking great idea – let’s do more of those!
让我们再来一个名字空间吧!
</code></div></pre>
<h2><a id="3__docstring_55"></a>3 什么是 docstring?</h2>
<p>Docstring是指在Python中用于文档化代码的字符串。它通常是函数、类、模块或方法的定义中的第一行,用于解释其功能、参数、返回值等信息。Docstring存储在对象<code>__doc__</code>属性中,可以通过访问该属性来获取docstring。</p>
<p><strong>定义方式:</strong></p>
<p>通常使用三引号(’’'或""")括起来的字符串来定义,并放在</p>
<p>案例</p>
<pre><div class="hljs"><code class="lang-python"><span class="hljs-comment"># -*- coding: utf-8 -*-</span>
<span class="hljs-keyword">class</span> <span class="hljs-title class_">User</span>():
<span class="hljs-string">"""
用户类
id:用户id
nickname:用户昵称
"""</span>
<span class="hljs-keyword">def</span> <span class="hljs-title function_">__init__</span>(<span class="hljs-params">self</span>):
<span class="hljs-keyword">pass</span>
<span class="hljs-keyword">if</span> __name__ == <span class="hljs-string">'__main__'</span>:
<span class="hljs-built_in">print</span>(User.__doc__)
</code></div></pre>
<p><img src="https://www.couragesteak.com/tcos/article/e7b883a169cc50f31beaa163a9a3c417.png" alt="image.png" /></p>
<h2><a id="4_Python__84"></a>4 Python 类型注解</h2>
<p>类型注解是 Python 3.5 引入的一个新特性,它允许开发者为变量、函数参数和返回值提那家类型提示,以提高代码的可读性和可维护性,并支持静态类型检查。</p>
<pre><div class="hljs"><code class="lang-python"><span class="hljs-keyword">def</span> <span class="hljs-title function_">add</span>(<span class="hljs-params">x: <span class="hljs-built_in">int</span>, y: <span class="hljs-built_in">int</span></span>) -> <span class="hljs-built_in">int</span>:
<span class="hljs-keyword">return</span> x + y
</code></div></pre>
<h2><a id="5__Python__93"></a>5 例举你知道 Python 对象的命名规范,例如方法或者类等</h2>
<p><strong>模块名和包名</strong>:全部小写,单词间用下划线分割。</p>
<p><code>my_module</code>、<code>my_package</code></p>
<p>**类名:**使用驼峰式(首字母大写)。</p>
<p><code>MyClasee</code>、<code>UserService</code></p>
<p>**全局变量和常量:**大写字母和下划线.。</p>
<p><code>MAX_COUNT</code>、<code>PI</code></p>
<p><strong>普通变量和函数名</strong>:使用小写字母和下划线。</p>
<p><code>my_var</code>、<code>calculate_sum</code></p>
<p><strong>私有变量和方法</strong>:以下划线开头。</p>
<p><code>_private_var</code>、<code>_private_method</code></p>
<p>**特殊方法(魔术方法):**使用双下划线开头和结尾。</p>
<p><code>__init__</code>、<code>__str__</code></p>
<p><strong>类内部的私有变量</strong>:可以使用双下划线开头,但这种方式通常用于避免子类中同名变量冲突,而不是真正的私有化。</p>
<p><code>__private_var</code></p>
<h2><a id="6_Python__123"></a>6 Python 中的注释有几种?</h2>
<ul>
<li>单行注释</li>
<li>多行注释</li>
<li>docstring注释</li>
</ul>
<pre><div class="hljs"><code class="lang-python"><span class="hljs-comment"># 单行</span>
<span class="hljs-comment"># -*- coding: UTF-8 -*-</span>
<span class="hljs-string">"""
多行、docstring
"""</span>
</code></div></pre>
<h2><a id="7__138"></a>7 如何优雅的给一个函数加注释?</h2>
<p>使用docstring,在函数开始第一行使用三引号。</p>
<pre><div class="hljs"><code class="lang-python"><span class="hljs-keyword">def</span> <span class="hljs-title function_">add</span>(<span class="hljs-params">x, y</span>):
<span class="hljs-string">"""
加法函数
x: 参数一
y: 参数二
"""</span>
<span class="hljs-keyword">return</span> x + y
</code></div></pre>
<h2><a id="8_Python__Tab___152"></a>8 Python 代码缩进中是否支持<code> Tab 键</code>和<code> 空格键</code>混用?</h2>
<p>理论上支持,但不推荐。</p>
<p>建议统一使用空格(通常是4个空格为一个缩进层级)来保持代码的可读性和一致性。</p>
<p>在PEP8规范中建议使用4个空格。</p>
<h2><a id="9_import_160"></a>9 是否可以在一句import中导入多个库?</h2>
<p>可以,</p>
<p>在python中,可以使用 <code>,</code> 将多个模块在一条语句中导入。</p>
<p>虽然python支持一行导入多个,但是在PEP8(官方编码规范)建议每个模块独占一行,以提高代码的可读性。(在java中也是相同规范)。</p>
<p>例如:</p>
<pre><div class="hljs"><code class="lang-python"><span class="hljs-keyword">import</span> os, sys, time
</code></div></pre>
<p>等同于</p>
<pre><div class="hljs"><code class="lang-python"><span class="hljs-keyword">import</span> os
<span class="hljs-keyword">import</span> sys
<span class="hljs-keyword">import</span> time
</code></div></pre>
<p>也可以使用 <code>from...import...</code> 一次导入多个对象(不是多个模块)</p>
<pre><div class="hljs"><code class="lang-python"><span class="hljs-keyword">from</span> math <span class="hljs-keyword">import</span> sin, cos, pi
</code></div></pre>
<h2><a id="10__Python__188"></a>10 在 Python 中文件命名的时候需要注意什么?</h2>
<p>全小写,单次之间使用下划线分隔。</p>
<h2><a id="11__Python__192"></a>11 例举几个 Python 代码风格的工具。</h2>
<table>
<thead>
<tr>
<th>工具名</th>
<th>主要功能</th>
<th>特点/说明</th>
</tr>
</thead>
<tbody>
<tr>
<td><strong>PEP8 / pycodestyle</strong></td>
<td>检查是否符合 PEP8 编码规范</td>
<td>最基础的风格检查工具,原名 <code>pep8</code></td>
</tr>
<tr>
<td><strong>flake8</strong></td>
<td>综合检查:PEP8 + 语法 + 命名等</td>
<td>可以集成 <code>pycodestyle</code>、<code>mccabe</code>、<code>pyflakes</code></td>
</tr>
<tr>
<td><strong>pylint</strong></td>
<td>强大的静态代码分析工具</td>
<td>可配置性强,评分制(0~10 分)</td>
</tr>
<tr>
<td><strong>black</strong></td>
<td>自动格式化代码(“黑盒式”)</td>
<td>快速统一风格,“不要争论格式”,可直接重写代码</td>
</tr>
<tr>
<td><strong>isort</strong></td>
<td>自动整理 import 顺序</td>
<td>和 <code>black</code> 常配合使用</td>
</tr>
<tr>
<td><strong>autopep8</strong></td>
<td>自动修复不符合 PEP8 的代码格式问题</td>
<td>相比 <code>black</code> 更保守,更贴近原始代码风格</td>
</tr>
</tbody>
</table>

评论区